かずおじです。IBM Cloudで無料のDb2インスタンスを作ってみました。その手順をまとめています。
IBM Cloud上のDb2インスタンスとは
IBM Cloud上で無料で簡単にデータベースのインスタンスを作成することができる。そのIBMのデータベース製品がDb2である。
無料だけど、サイズ等の制限があるので注意。でも勉強にはすごく良い〜。
アカウント作成・ログイン
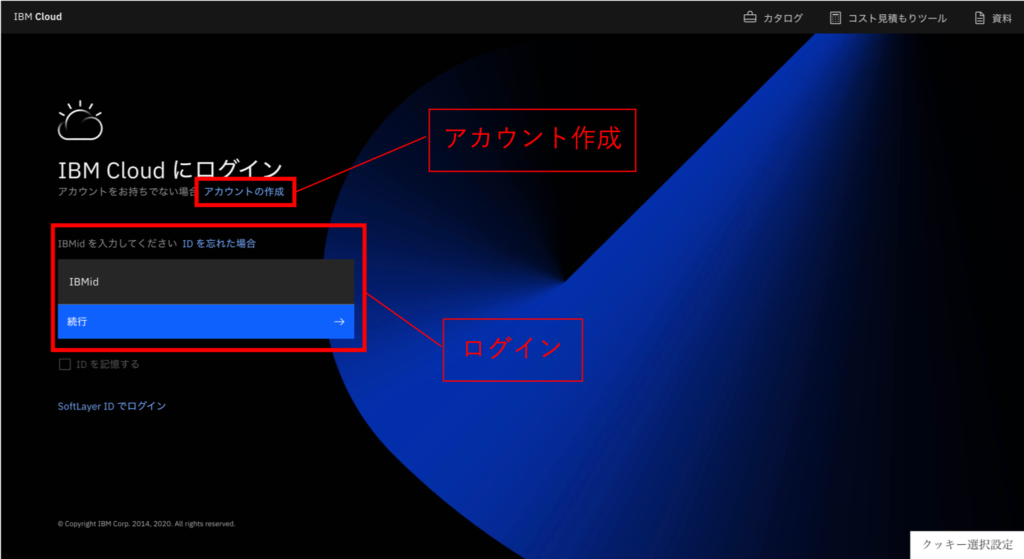
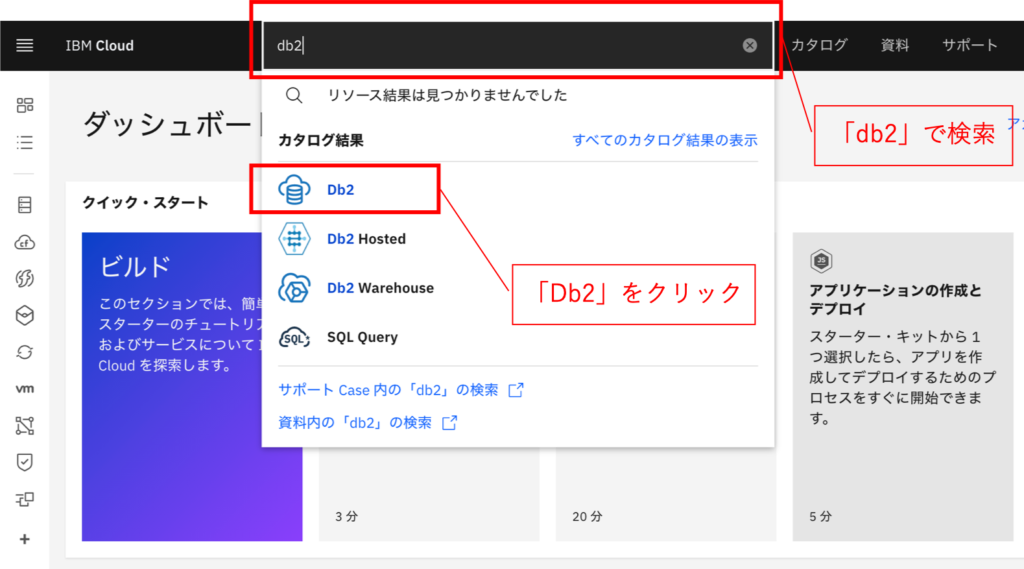
以下にアクセスし、アカウントを作成・ログインする。登録は無料。
Db2インスタンスの作成
ログイン後、「db2」で検索し、「Db2」をクリック。
「Lite」プランを選択した状態で、「作成」をクリック。
※「Lite」プランの制限が記載されているため、要確認。
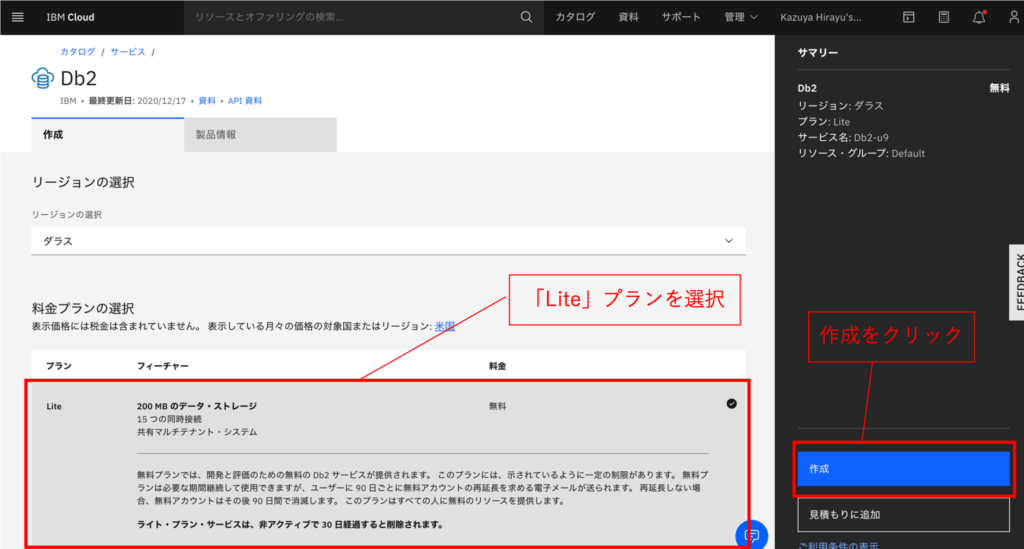
これで作成が完了。
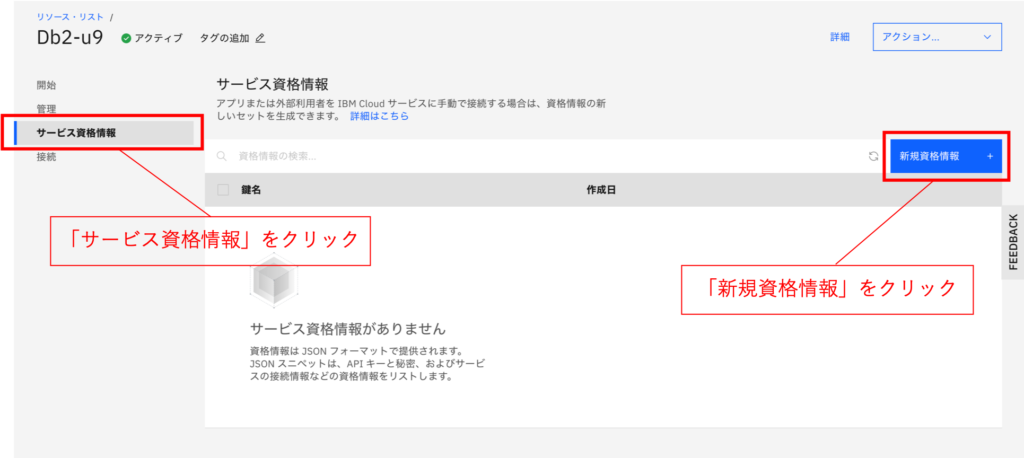
資格情報の作成
資格情報とは、データベースインスタンスにアクセスするために必要な情報である。(ホスト名、ユーザー名、パスワードなど)SQLクライアントソフトなどから接続する場合に必要となるため、作成しておく。
左のメニューから、「サービス資格情報」をクリックし、「新規資格情報」をクリック。
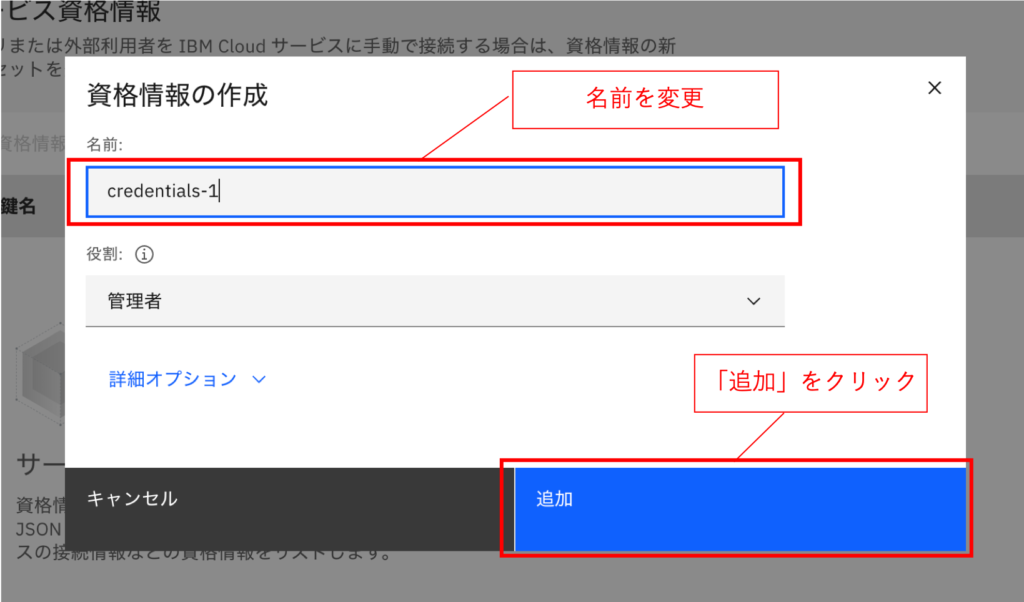
名前を変更し、「作成」をクリック。
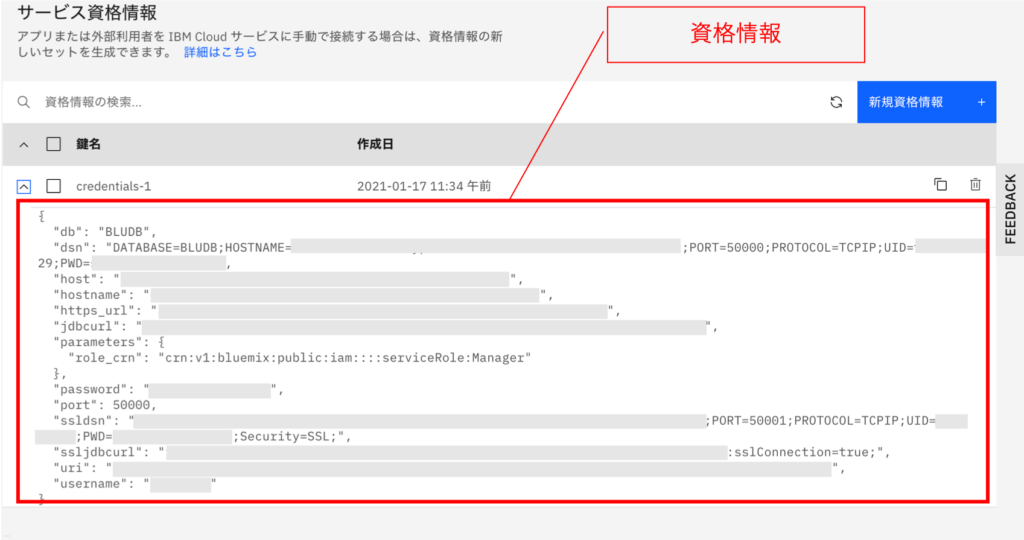
作成した資格情報をクリックして、内容を確認。
テーブルの作成・データの読み込み(ロード)
データは以下を想定。(test.csv)
str,int,float,date
test1,1,1.0,2021-01-01
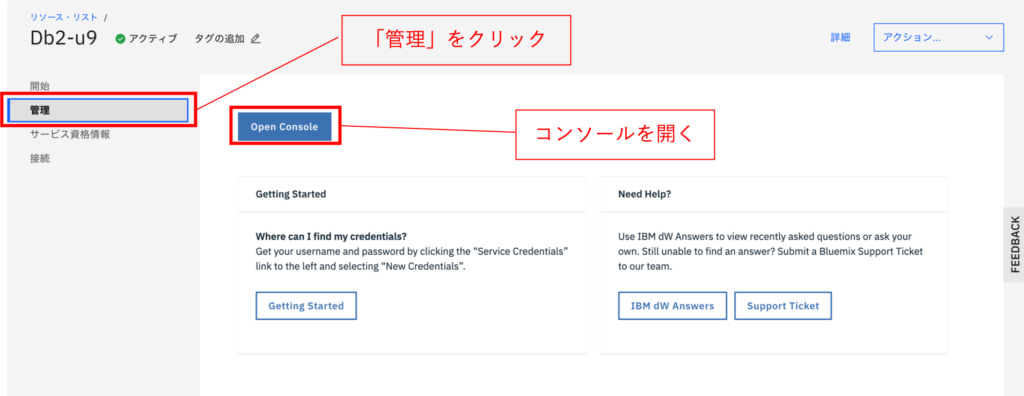
test2,2,2.0,2021-01-02Db2インスタンスの画面で、メニューから「管理」をクリックし、「Open cosole」をクリックしてDb2コンソールを開く。
↓コンソール画面
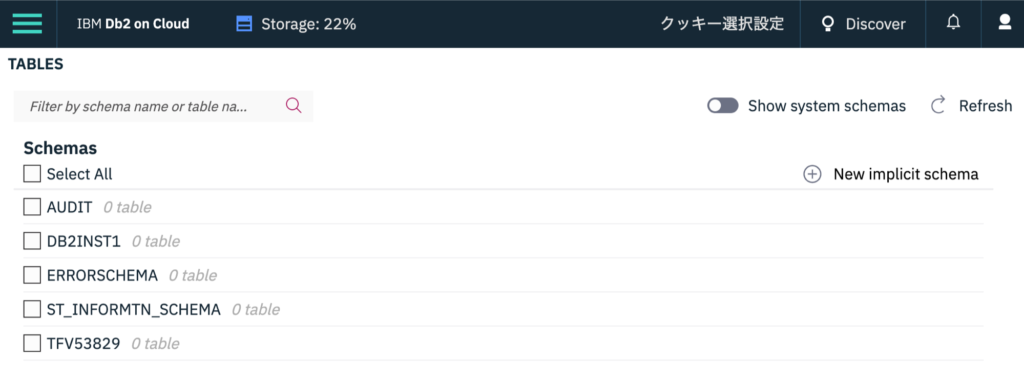
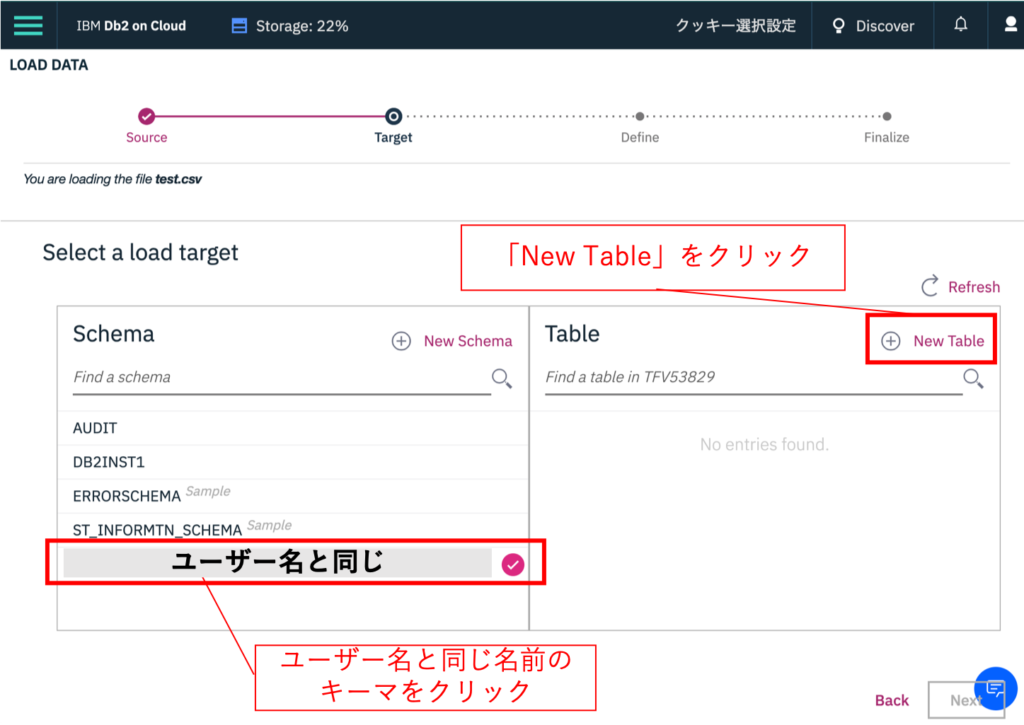
このコンソールは、GUIからテーブルの作成やデータの追加などが可能である。ここではロードしたいデータのデータ列を設定し、テーブルを作成する。なお、Liteプラン(無償枠)では、ユーザー名と同じ名前のスキーマしか操作できない。そのため、テーブルもそのスキーマ下で作成しなければならない。
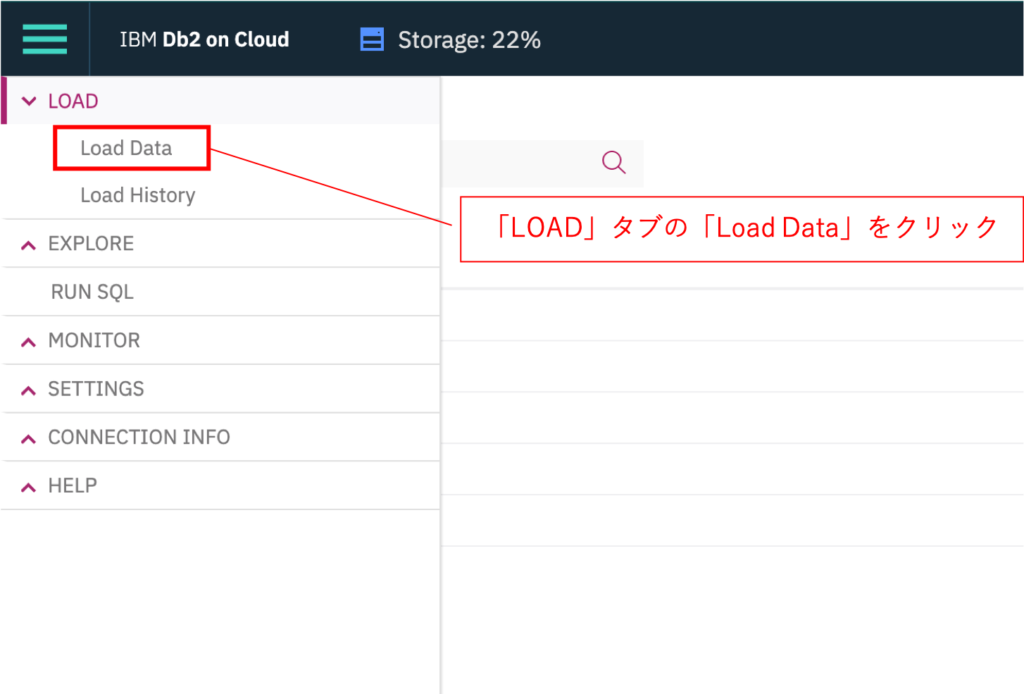
左のメニューから「LOAD」タブの「Load Data」をクリック。
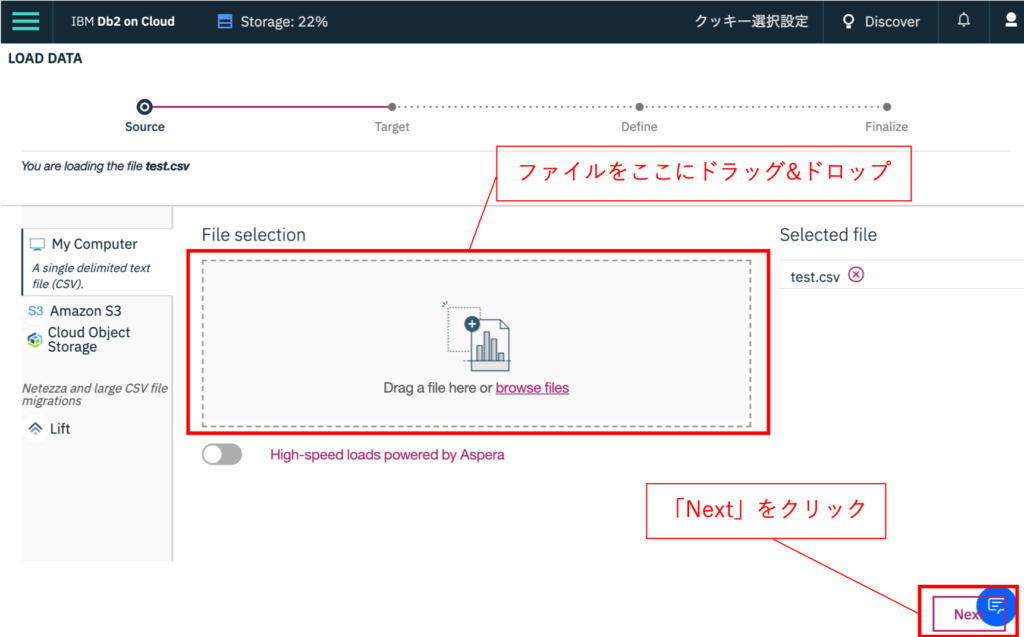
読み込みたいファイル(ここでは、test.csv)をドラッグ&ドロップし、「Next」をクリック。
ユーザー名と同じ名前のスキーマをクリックし、「New table」をクリックする。
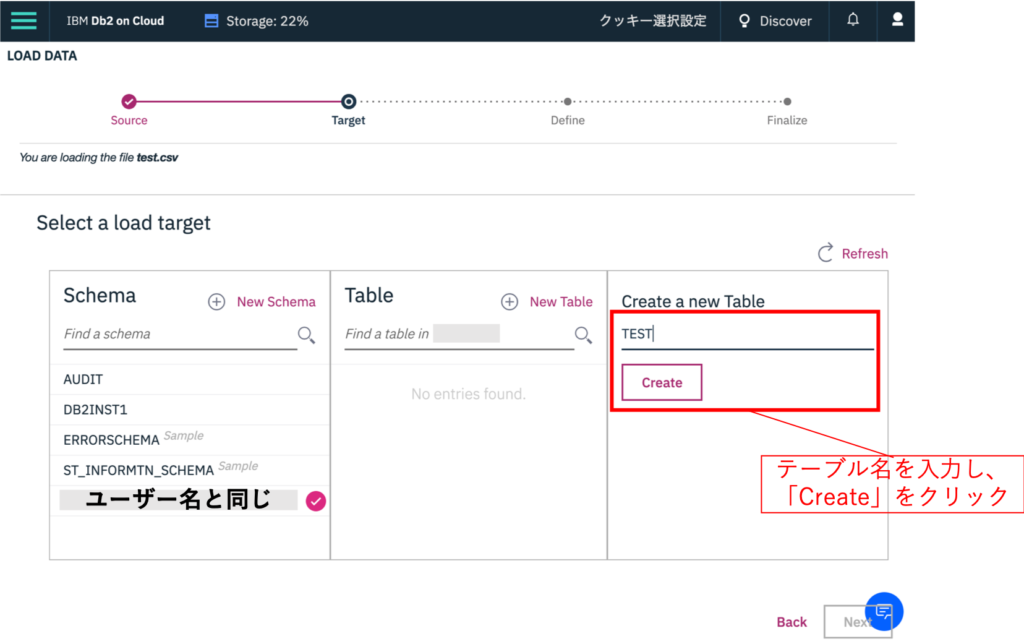
テーブル名を入力し、「Create」をクリック。
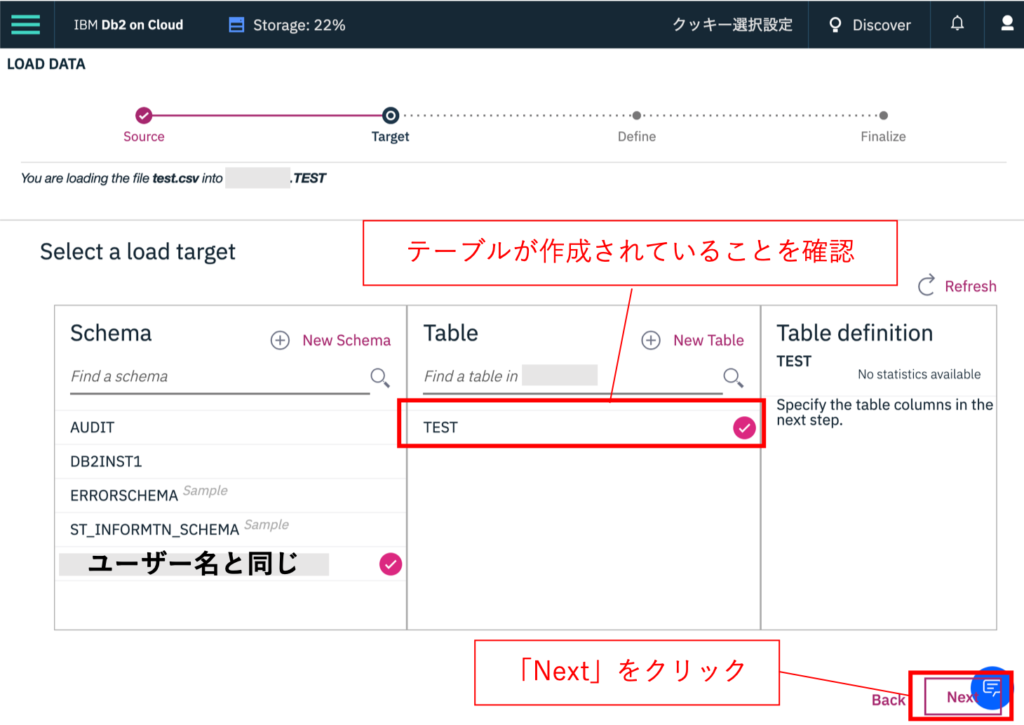
テーブルが作成されたことを確認して「Next」をクリック。
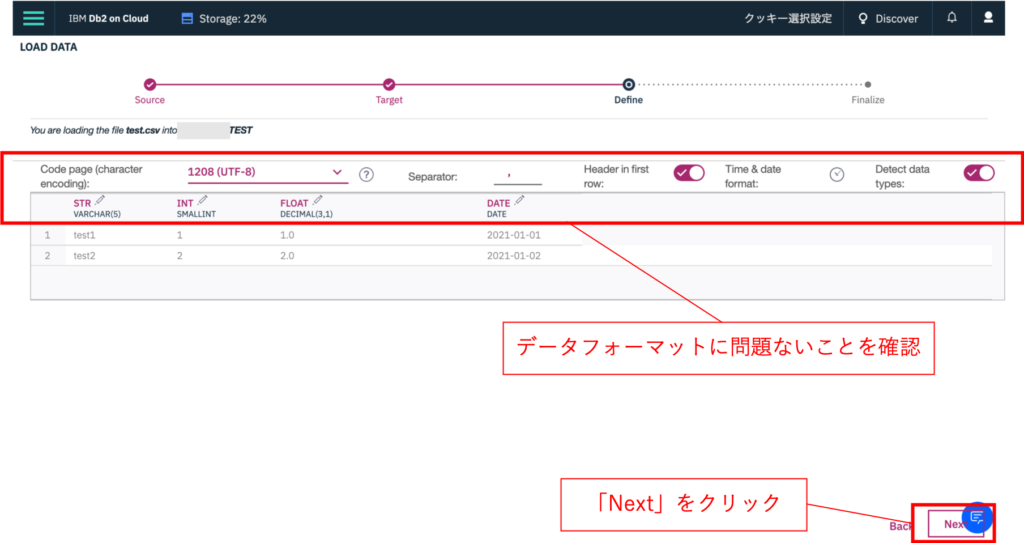
自動判別されたデータフォーマット(VERCHARとか)を確認して、問題なければ、「Next」をクリック。
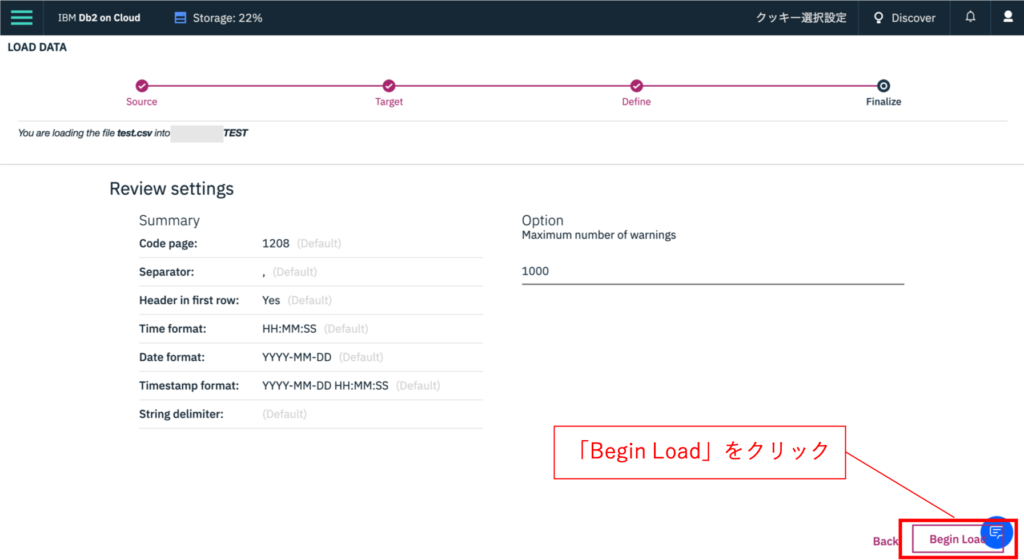
問題なければ、「Begin Load」をクリック。
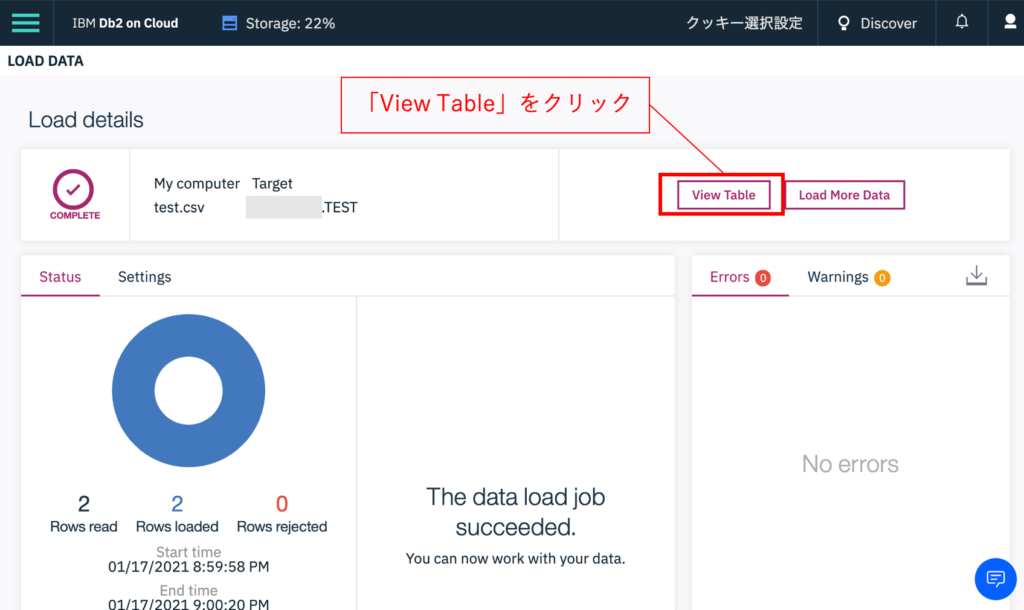
少し待つと完了するので、「View Data」をクリック。
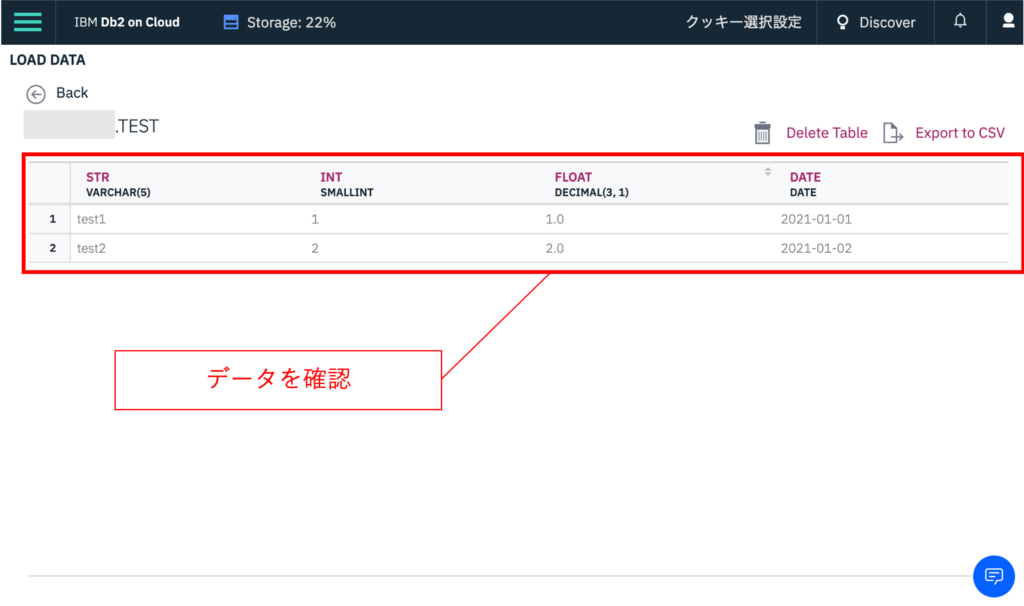
データを確認。これでテーブル作成・データの読み込みが完了。
おわりに
IBM Cloud上でDb2のインスタンスを作成して、データを追加してみました。データベースの初歩の勉強用として準備しやすいかなと思います。このインスタンスを使ってSQL等を勉強していこうかと思います。